Wednesday, May 4, 2016

MQS news and Look Kevin, I Can do Scrappy! PICTURES!!!!

It seems like forever since I posted, but I have been so busy. As some of you know, I have started teaching at some of the National Long Arm shows.

Next week I head out to MQS in Cedar Rapids. I still have a few openings in my Tuesday hands-on longarm class "Background Fillers Revisited". We'll be stitching out 20+ designs (I've recently added several more) and learning how to combine them into free flowing backgrounds that still look cohesive thru out your quilt. Or, if your interested in learning more about Rulers/Templates, come join me Tuesday afternoon for "I Bought this Ruler, Now What?". We'll be covering the basics of ruler use, and looking at a multitude of rulers. Never be afraid of a ruler again! MQS Registration

In April I headed East, the furthest East I've been in the US. I spent 3 days teaching at MQX New England. My students were AWESOME! Hopefully they'll have me back next year. There were some beautiful quilts there. As a teacher, I had the honor of awarding a Teacher's Ribbon to a quilt of my choice. I choose Jane O.'s Quilt, "Gus and Maria's Agave Garden". This is my favorite kind of quilting, all the bright colored threads on the black background!


Hubby and I spent a few days sight seeing on the way up and also on the way back, a mini vacation. We had a picnic on the beach at Lake Erie, in the snow, in 29', in the van.  We drove thru Vermont's mountains, absolutely beautiful. Snow on the ground, beautiful scenery, maple syrup, I could definitely visit there again. On the way home we stopped at Gettysburg and Antietam. Hubby is a history buff.

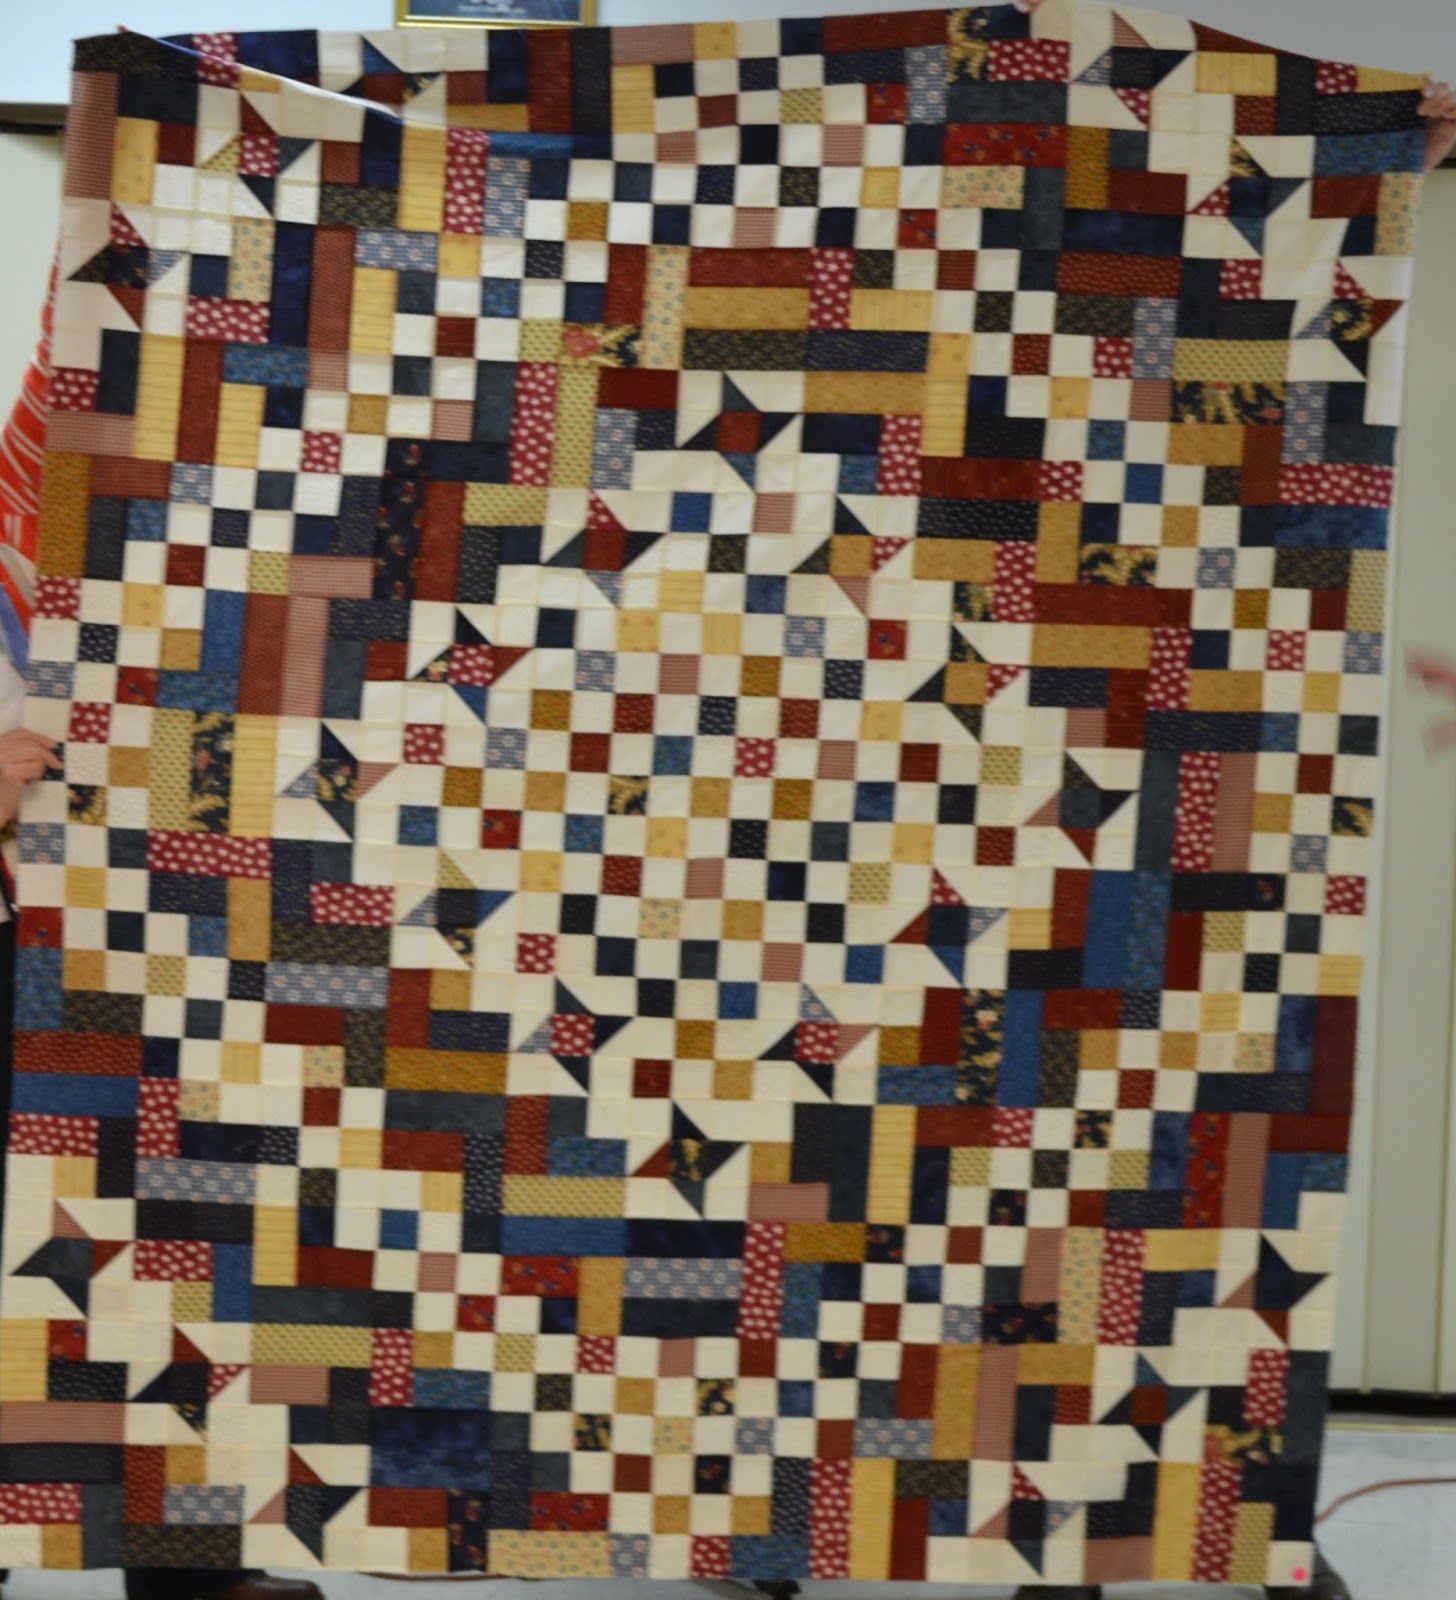
Yesterday I spent the morning at my Stitch 'n Time Quilt Guild meeting. All of the "Look Kevin, I can do Scrappy" Mystery Quilts were due. I was amazed and doing my little happy dance when I saw all the quilts members had made! I am happy to share our Show 'n Tell of Mystery Quilts with you.

If you have completed yours, please send me pics to post.

I love how they all turned out. Mine is in batiks, but I may have to make another one in Thimbleberries or Kansas Troubles. In case you didn't know, this Mystery Quilt is named after my friend Kevin, (blogs at Kevin The Quilter) who I consider the King of Scraps. This first quilt is his. He reversed the lights and darks, using golds and blacks. I love how it turned out!


This next quilt is from Susan P. who found my blog and created this beautiful spring version.


The rest of these are from my Stitch 'n Time Quilt Guild. The first two of these are being donated to
Quilts of Valor! 


Finished with a scalloped border! 


My friend. Unfortunately her Studio burned to the ground with all her quilting supplies and her quilt. She vows to make another one in the future!  


I hope you all have enjoyed seeing the Mystery Quilts these amazing quilters made. I know I did. 
Happy Quilting,
Ann

Friday, February 26, 2016

Corona de Flores

I can finally talk about my latest book adventure! Over a year ago, my friend  Casey York of Studiolo asked me to quilt her quilt top for her next book. That book has been released, so I can now share the process I used to quilt it for her.

First things first, the book.....


When you buy your copy, check out page 14, 122 and 124 to see pictures of my quilting! The name of the quilt is Corona de Flores.

When Casey first showed me the quilt top, I was super excited to see all that negative space and my mind immediately started designing the quilting. Casey wanted it quilted in a medalion style, modern quilting, but with a little traditional thrown in.

My process begins with laying the top out and soaking it in for a few days.


I decided to treat this as a Round Robin Whole cloth, designing each "row" individually. To keep the quilting cohesive, I incorporated key elements through out the rows. The appliqued flowers were the focal row and inspired the center and corner motifs. I drew out this pattern while traveling one day and, after meeting with Casey and sharing ideas, got to work quilting.


I used painter's tape to mark out the rounds and also as a quilting guide. This way I knew where the rounds should be without extensive use of a marking pen.


I used two layers of batting, Hobbs Heirloom 80/20 and Quilter's Dream Wool. The top layer of wool adds dimension to the quilting and the applique. I used my favorite thread, Glide by Fil-Tec. Bobbin Central

The center motif is based on the appliqued flowers. This flower motif is repeated in the corners.


To complete the designing of the center flower, I placed a sheet of Quilter's View Film over the quilt and used a dry erase pen. The curved cross hatching has a more modern feel. Micro stippling will make the flower pop.


The next round was the space between the center square and the flower ring. Casey liked the idea of clam shells. I gave them a modern twist by quilting them in decreasing rows.


The center is quilted with the curved cross-hatching. I changed my mind, and instead of micro-stippling behind the flower, I used my version of water.


I almost stopped here, with only the curved arcs, because I loved the motion it added to the quilt. Obviously the cross-hatching won! Then came the decreasing rows of clam shells.


Finally, the flower round. I used monofilament thread from Fil-Tec to outline every flower. I also quilted through the appliques to add dimension and to anchor each applique. With the amount of quilting in the other rounds, the applique would have puckered without it. Stippling around the flowers completed the round.


The corners that square off the flower round contain Greek keys and more clam shells.


 Each corner in the final round has a flower, water background fill and curved arcs. It took a little mind work to remember to 'spin' the arcs in the right direction in all four corners. I've started the piano keys in the final border. That wide, unquilted border will be filled with Greek Key.


And lots more pictures, just because I love how this quilt turned out!!!


I may quilt my piano keys a little different than others. I know I will be quilting half inch keys. I know that piano keys 'suck' in fabric and often shorten corner fabric. I marked 1" lines with a blue water soluble pen on the batting. I started on the outer corners and quilted the 1 inch lines on both ends, anchoring the fabric corners. I then quilted from the side to center on 1" marks and then from the other side to center. I then quilted the 1/2" lines. I also quilt my keys from off the quilt in and then straight back out, so they are double stitched. I repeated this on the sides. It may seem like extra work, but it helps me keep the quilt border width from 'shrinking' unevenly with the quilt's center.

Off the machine and ready for binding!


I'm glad I finally was able to share this quilting journey with you. It was sooooo hard to not share! I hope you have been inspired by my quilting and will try some of the patterns/ideas from Casey's book. I have some Kaffe fabric that I can't wait to use to make ME one!

Happy Quilting
Ann


I


Saturday, December 5, 2015

Look Kevin, I Can Do Scrappy! Final Reveal!!!

Wow, I can't believe it's been 6 months already! I hope you're all ready for my big reveal of my Mystery Quilt...

But first, Some other news. As you know, I will be teaching at MQX New England (Ann's Classes) in April and at MQS Cedar Rapids (Classes, scroll way down to find me) in May. I will be teaching a Ruler/Template class at both. We will be discussing lots of rulers by lots of vendors. Rulers are my Quilting Passion and I can't wait to share lots of information with you all. Things like, how to hold, what all those lines mean and especially, what else can we do with them. We'll also be looking at some of my favorites and discussing why I like them, with lots of tips and tricks thrown in.

So, to make things a little more interesting and because I am always looking at new ways to use a ruler, I have decided to have a couple 'contests' for my students. I will be, at random, posting pictures on Facebook of designs using various SECRET, unidentified rulers. Don't post your guess in the comments, save them for class. For every ruler you guess right, you will put your name into the drawing for a prize.

Ok, now on to the Mystery Quilt, the Final Reveal....


Month 6—Putting it All Together!

This month you will be putting the quilt together. We will be sewing the blocks in rows, then the rows together to make the quilt.
You will need all of the blocks!

Make 2 of each of these rows —

Rows 1   and 13


 Rows 2   and 12


 Rows 3   and 11


 Rows   4 and 10


Rows 5   and 9


Rows   6 and 8


Row 7—Make 1, this is the center row.


Sew the rows together, pay attention to the orientation of the rows. 1 and 13 may be the same, but the top edge of row 1 is the bottom edge of row 13. Measure the sides of your quilt and cut 4.5” strips from 2 fabrics for each side. Sew on the side borders. Press to the border fabric. Measure the top & bottom of your quilt and cut 4.5” strips from the remaining 2 border fabrics. Sew on the top & bottom borders. Press to the border fabric.  (I had lots of fabric and decided to make mine 6" borders cut at 6.5")

LOOK KEVIN, I CAN DO SCRAPPY!!


I hope you enjoyed the Mystery and I can't wait to see pictures of your finished quilts!

Happy Quilting,
Ann


Monday, November 9, 2015

BIG News!!! and Look Kevin, I Can Do Scrappy, Month 5

BIG, BIG, BIG NEWS!!

If you felt the Earth move, that was me doing the Happy Dance! I am excited and over the top happy to announce my teaching engagements for next year. I don't know where to start, so here they are in order.

In January, I get to return to Hunter Heirloom in Warrensburg, MO. I just love Amy and Joe the owners, they are so easy and fun to work for. I will be teaching hands-on ruler classes(s), a feather class and a background class. Check with Hunter Heirloom for dates and times.

April 6-8, I will be heading to Manchester, New Hampshire to teach at MQX, New England!! I will be teaching a Hands-on Feather class, a Ruler lecture and a Background lecture! To see my classes visit the MQX site "Ann McNew Classes" and register soon, classes are filling up!


Since I have never been this far east, we are turning this into a vacation, Some sight seeing on the way out, including a trip to visit my friends Dusty & Stephanie Farrell from Country Stitchin in Cambridge, PA! Then some Civil War sights on the way home.

May 10-14 I will at MQS Classes in Cedar Rapids!!! I will be teaching on Tuesday, a hands-on background class and a Ruler Lecture. The rest of the week, you will find me either in Dusty's classes (that cute little assistant in the back...lol) or helping in the Country Stitchin booth, or wandering around spending money.... If you are a member of IMQA, you can register for classes now. Again don't wait too long, classes fill up fast and I would love to see you in my classes!


That;s my schedule so far, but there is more in the works......

Look Kevin, I Can Do Scrappy

As we start Month 5, remember - each month's directions will be posted on the 2nd Tuesday of the month, for 6 months.  If you or your local quilt guild would like to use my pattern for this Mystery Quilt, please feel free.  You have my permission to make copies for your guild. All I ask is that you give me credit for the pattern  If you would like it in PDF format, please email me (atticthreads@yahoo.com) and I will add you to my email list.

If you missed any -       Month 1             Month 2             Month 3            Month 4
                                                  
                                     Month 4 Correction

A Little More Challenging Piecing!

This month you will be doing more chain piecing. My only rule for myself was to not worry about my fabrics looking good next to each other. (ok, so it still couldn’t be same fabric used twice in a block…) Just grab and sew.

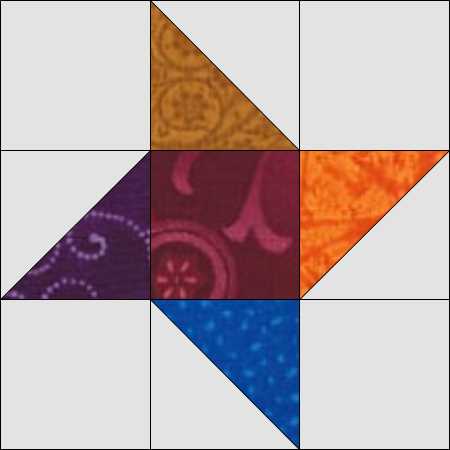
Marcia’s Rising Star

You will need all of the half square triangles (HST)
96 of the light 2.5” squares
24 of the dark 2.5” squares

I chain piece all of the sets, cut apart and then press.

Sew a HST to opposite sides of each of  24 dark squares. Press to the dark square. (A)

** Pay attention to the
        Orientation of the HST’s***

Sew a light square to opposite side of 48 HST’s. Press to the light square. (B)

** Pay attention to the
        Orientation of the HST’s***

Sew a (B) strip to each side of an (A) strip. Make 24 star blocks.


Now, aren't you glad you made all those pesky HST?

The end is in sight! Next month we'll be putting it all together.

Happy Quilting,
Ann