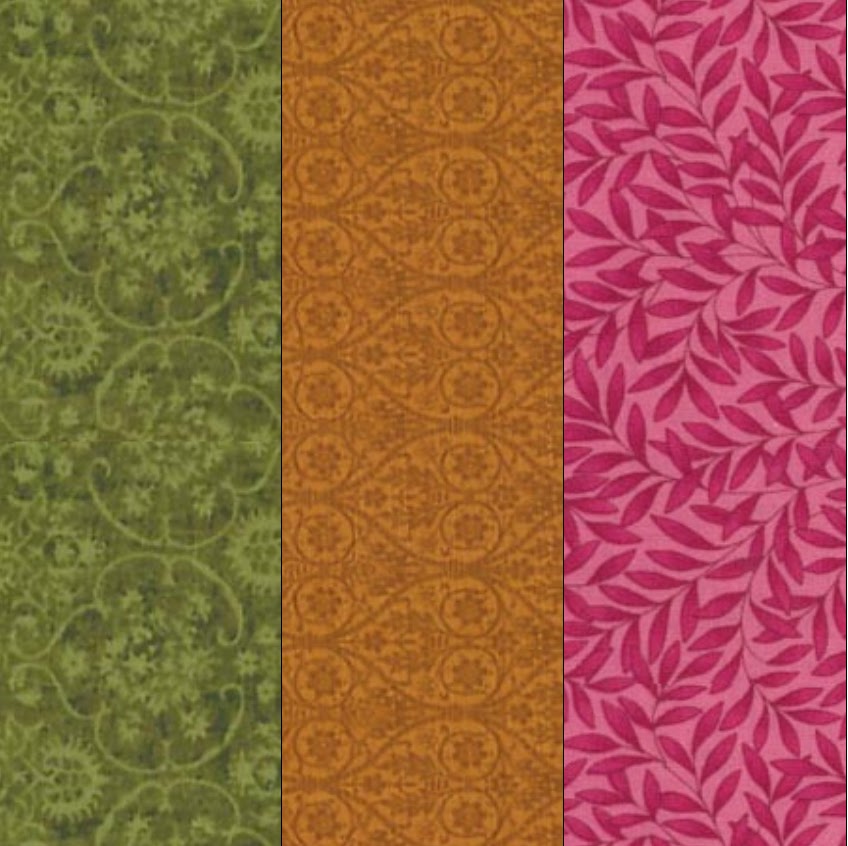
Tuesday, September 8, 2015

Mystery Quilt Month 3 - Look Kevin, I Can Do Scrappy! and My BIG News!!

Before we get to the Mystery Quilt, I have some BIG news... I will be teaching at MQX New England next April. The classes are not listed yet, but visit the website often for future updates!  MQX New England


I will be teaching 3 classes, a hands-on Feather class, a Ruler lecture, and a Background lecture/demo. If you are anywhere near Manchester, New Hampshire, come see me. I love meeting Quilters and making new Quilty friends! 


Welcome back to my Mystery Quilt, "Look Kevin, I Can do Scrappy!"

Three months in and I'm excited to say, "ALL OVER THE WORLD!!" Quilters are stitching those pesky 1/2 square triangles thanks to me.  Ok, maybe not just because of me, but we do have an awesome number of quilters participating in our Mystery. I think Quilters in Australia are the furthist. 


I'm still waiting for more fabric pics......

As we start Month 3, remember - each month's directions will be posted on the 2nd Tuesday of the month, for 6 months.  If you or your local quilt guild would like to use my pattern for this Mystery Quilt, please feel free.  You have my permission to make copies for your guild.  All I ask is that you give me credit for the pattern  If you would like it in PDF format, please email me (atticthreads@yahoo.com) and I will add you to my email list.

If you missed any -       Month 1             Month 2


Month 3—A Whole Lot of Easy-Peasy Piecing!

This month you will be doing a lot of chain piecing. My only rule for myself was to not worry about my fabrics looking good next to each other. (ok, so it still couldn’t be same touching same…) Just grab and sew.  

This block is dedicated to my friend Lee Etta, who makes the most beautiful scrap quilts. She has tried to explain to me the "How-To's" of scrappy several times! I think it finally took.  

Lee Etta’s Corner

You will need                        76 of the 2.5” light fabric squares
                                              76 of the 2.5” dark fabric squares
                                              All of the 4.5” dark fabric strips
                                              76 of the 6.5” dark fabric strips

Always press to the dark. I chain piece all of the sets, cut apart and then press.

Set 1.  Sew a 2.5” light to a 2.5” dark, press


Set 2.  Sew a 4.5” dark to Set 1, press


Set 3.  Sew a 4.5” dark to Set 2, press


Set 4.  Sew a 6.5” dark to Set 3, press


You will have 76 Lee Etta’s Corner blocks measuring 6.5” x 6.5”.

Be careful to build your blocks on the proper side! Here's a picture of mine all stitched, pressed and ready, not stitched in the correct order! Easy to do, harder to un-do!


Don't forget, please send any pics of your fabric or blocks. My friend Kevin, the Quilter, sent me a pic of his cut fabric, blacks and golds! He's swapping the dark and lights. WOW, It's going to be stunning!
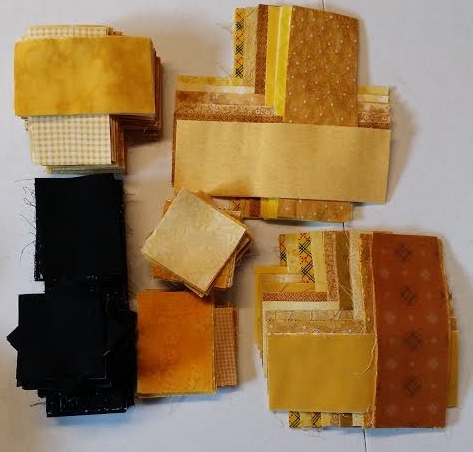

Shhhhh....While visiting my friend Susan, I found her Mystery Stash, cut, labeled and ready for sewing!


Happy Quilting,
Ann

Thursday, July 30, 2015

Mystery Quilt Month 2 - Look Kevin, I Can Do Scrappy!

Welcome back to my Mystery Quilt, "Look Kevin, I Can Do Scrappy!"

 I'm so happy to have received so many responses from quilters ALL OVER THE WORLD! I can't wait to see pictures of the finished quilts. In fact, I'm way to excited to wait. Sooo, I would love for some of you to take pictures of your piles of cut pieces for me to post, just a little taste of fabric for the rest of us!

As we start Month 2, remember - each month's directions will be posted on the 2nd Tuesday of the month, for 6 months. If you or your local quilt guild would like to use my pattern for this Mystery Quilt, please feel free. You have my permission to make copies for your guild. All I ask is that you give me credit for the pattern. If you would like it in PDF format, please email me (atticthreads@yahoo.com) and I will add you to my email list.

I've been asked to create a button for this Mystery Quilt and I would love to, as soon as I find someone who knows how to do that!

If you missed past month(s):       Month 1

Month 2—Let’s Get Piecing!

Since I made you work so hard cutting all those pieces last month, I thought I would take it easy on you this month. Just a little sewing, only 4 blocks to start.
I’m also giving you instructions to start making those pesky 1/2 square triangles. We won’t be using them for a while, so it will give you a couple months to finish them.

Lynn’s Fence

You will need 12 of the dark 6.5” pieces.
Using 8 of the strips, sew 2 strips together to make 4 pairs.


Sew a strip on to each pair to make the block. Press both seams in the same direction. Blocks should measure 6.5” x 6.5”. You will have 4 blocks.


You didn't think I was going to let you off that easy, did you? It's time to start those dreaded.....


Half Square Triangles

You will need 16 Thangles 2” strips. Cut each Thangles strip apart on the DARKER DOUBLE HORIZONTAL LINE, not the solid diagonal line between the dash lines! You will now have 48 Thangles patterns.

Using the 3.25” dark and light pieces:

Pair up a dark 3.25” piece and a light 3.25” piece right sides together. Pin a Thangles pattern to the pair and stitch on both DASH lines. Cut apart on the SOLID line.
OR
If you are using yardage for your background, use the 3.25” dark pieces and 9.75” light. Lay 3 dark pieces end to end on the larger light strip.
Pin a Thangles strip on top. Stitch all dashed lines, cut apart on all solid lines.

Remove the paper and press to the dark.

You will have 96 half square triangles. They should measure 2.5” x 2.5”.


But, don't freak out on me there. Remember, we won't be using these for a few months, so there's no rush. Although some of us have found them to be addicting!

Don't forget, send fabric pictures to share.

Happy Quilting,
Ann


Tuesday, July 7, 2015

Mystery Quilt Month 1 - Look Kevin, I Can Do Scrappy!

I belong to a quilt guild that asked me to create and present a Mystery Quilt. I then immediately volunteered to present it to 2 of my other guilds. Each month's directions will be posted on the 2nd Tuesday of the month, for 6 months. If you or your local quilt guild would like to use my pattern for this Mystery Quilt, please feel free. You have my permission to make copies for your guild.  All I ask is that you give me credit for the pattern. If you would like it in pdf format, please email me (atticthreads@yahoo.com). 

Also, please send me photos of your completed quilts!
Happy Quilting!
Ann

Look Kevin, I Can Do Scrappy!
2015 Mystery Quilt
Created by Ann McNew
Attic Threads & Quilts

Scrappy, scrappy, scrappy! I’ve learned from my friends, to love the look of a scrappy quilt. So, I dedicate this quilt to Kevin, (Kevin The Quilter) who challenges me to get out of my comfort zone, and to Lee Etta, who inspires me to get scrappily creative.

So, let’s talk fabric. The fabric requirements are pretty simple. All the piecing is based on 
2 1/2” strips. The largest piece will be 2.5” x 7.5”, the smallest will be 2.5” x 2.5”.

Pull from your stash or use jelly rolls. Your fabric should be lights and darks. There should be a definite division of color depth, blendy-blendy mediums that can go either way should not be used.

I used 3 jelly rolls, 1 light and 2 dark. There were a couple of strips that were questionable mediums, so I pulled from my stash to replace them. If you have a lot of dark, but want the look of a single light fabric, you will need 2 yds for your back-ground. You will need 1/2 yd each of 4 fabrics for borders.

You will also need 2” finished Thangles for those pesky 1/2 square triangles. (16 strips)

The finished quilt will measure 74” x 86”.

Your assignment Month 1…….. Go shopping in your stash!

Month 1—Let’s Get Cutting!

Remember, everything is cut from 2.5” strips. If you are using jelly rolls, cut the largest pieces first. I laid out rows of strips in piles of 4 strips each and cut from multiple fabrics with each cut. This way all of one size wasn’t of the same fabric.
Put each size piece in a bag marked with the strip size.

From your lights (background) cut the following:

            # of pieces       length

                  50                7.5”
                  48                3.25” (yep 1/4”)******
                172                2.5”

From your darks cut the following:

                  61                7.5”
                  88                6.5”
                152                4.5”
                  48                3.25” (yep 1/4”)
                100                2.5”


******if using yardage for background, cut 16 strips at 9.75”


Monday, June 15, 2015

Easy Peasy Hand Dyed Fabric!

Last summer I discovered Hand Dyes! Who knew it would be so much fun? and addicting? This is where it all started. I hand dyed all the fabric I used in my quilt "Opposites Attract". It took 3rd place at MQS in the Fabric Challenge.


But, apparently, I could not stop there. I have been hand dying fabric for the last 2 weeks! I've been asked to show my "technique". So, first let me say, I dye like I cook. I don't measure, hardly ever, and Hubby thinks I'm great cook. Everyone loves my hand dyes so I must be getting it right. Second, I'm all into EASY. If you know me, you know I don't follow the rules. Third, I'm into recycling. That means that old butter tub really is useful. Fourth, I don't like all those chemicals. There are lots of videos on the internet showing how to dye, most use multiple chemicals. These are often hard to find and have lots of safety rules. (refer back to second above)

My list of supplies.... not a lot.

                 1.     Fabric. I always use KONA Prepared for dyeing or PFD
                 2.     Salt. Just plain old cheap table salt.
                 3.     RIT Liquid Dye (I don't use powder dye because of the dye dust) and this can usually
                                be found at most Grocery stores in laundry supplies.
                 4.     Rubber gloves. Old clothes.
                 5.     Assorted plastic containers, i.e. butter tub, ice cream tub, coffee tub...
                                NEVER NEVER NEVER USE ANY CONTAINERS THAT HAVE BEEN
                                USED WITH DYES FOR FOOD! NEVER NEVER NEVER!!!!


So, Easy Peasy Hand Dyes -----

Unfold the fabric. I used 2 yards. Scrunch it up. Place in the sink and completely soak with HOT tap water. Do not wring the fabric. I do this in a stainless steel sink and have never dyed my sink. 


Place the fabric into a plastic container. I'm using a gallon ice cream tub. I use a large butter tub for 1 yard of fabric.  You want it to stay scrunched up tight in the container. Fill the container with HOT tap water until the fabric is just covered. 


Remove the fabric from the tub and place to the side. Do not wring the fabric. It will drain some water off, that's OK. 

See, we didn't have to measure the water needed for our dye bath! Put on your rubber gloves, no one wants a dyed hand. At this point, shake in some salt, about 2-3 tablespoons is fine. Pour in some dye. I use about 1/2 the bottle for 2 yards. The more you add, the more intense the color will be on the fabric. Less dye, less intense. Stir well. some colors like yellow and orange need a little more stirring. I use a plastic fork.


Pick up the fabric trying to not un-scrunch it. Do not wring the fabric. Place it in the dye tub gently. Push the fabric down (I use that plastic fork) until all the fabric has been slightly colored by the dye. You will have air pockets in the fabric. That's OK, you're suppose to. You will not have enough water to completely cover the fabric. That's OK, you're not suppose to. The fabric sticking out will dye lighter. The fabric on the bottom will dye darker. There will be varying shades of color through out the scrunches.


Put the lid on the container and let it sit for at least 3 hours. The color needs time to develop. If you don't want a lot of light color in your fabric, you can periodically push the fabric down in the tub (with the plastic fork). I have even set some fabric to dye and left it over night.

When the time has elapsed, open the tub and run COLD tap water in over the fabric.  I tilt the tub so the water runs out the lower edge and aim the flow in the top of the tub.  Run the water in this way until the water running from the tub is fairly clear. Dump the fabric into the sink and keep running COLD water over it. Use the plastic fork to spread the fabric open while rinsing. Once the water runs fairly clear from the fabric, I throw it in the washer. I wash it using my regular laundry soap. I usually throw in something to help it agitate, like an old towel or Hubby's jeans. I wash in COLD water with my machine set for 1 size larger load and extra rinse.

Throw in the dryer and it's ready to use! The Aqua is still drying, but here's the purple!


And then you can go crazy, mixing colors, over dyeing, squirting and sprinkling. 

Play time!

I first dyed with Lemon. 

It wasn't as dark as I wanted. 
Dye bath 2 -  I re-scrunched and twisted the fabric. I only filled the container with about 1 inch of water and used Tangerine dye. 

Still not done. Couldn't help myself... 
Dye 3 -- I had some Scarlet dye left, so I mixed with HOT water in a small squirt bottle. I laid the fabric out in the grass and squirted it. Some streaks, some dots, some dye pools. 

Yep, you guessed right, I just couldn't stop!
Dye bath 4 -- I re-scrunched the fabric with a twist. I filled the container with 1/2 inch of water and Royal blue dye.

I completely rinsed and washed and dried the fabric between Dye baths.

I probably should stop now.... not sure what to do with this 2 yard piece of Hand Dyed fabric. There really is no white in it, that's pale yellow that did not photograph well. 
I think it would work well cut up for Applique? 2 1/2" strips? What do you all think? Any ideas?


I hope you enjoyed this post. I love Hand Dyes and I JUST CAN'T STOP!

Happy Quilting,
Ann 


Wednesday, May 27, 2015

Bird of Prey

Finally, I can now show the quilt I was working on for the last couple months. I like to keep it secret till after the MQS quilt show.  It was fun to work on, tried some new techniques, and, even though it didn't win anything, I still love how it turned out. (it was held for consideration for it's category and Judges Choice).

Last summer, while camping, I played with painting fabric.  I placed a bunch of rocks and logs on the picnic table to create hills and valleys. I then draped the Kona  PFD fabric over my piles and painted away at random.


Next, I created my Eagle Applique.  I've been working on this pattern for a couple years. I started with a photo I took years ago when Hubby and I were on vacation in Minnesota. Each time I've used my pattern, I've increased the number of pieces.  Now I'm up to over 70. There is no sewing on this piece until I get it on BeBe, my longarm.  All edges are turned under and machine appliqued on BeBe. My Eagle is made using only Stonehenge fabric.


I completely stabilized the background, placed the Eagle, and started having fun!  My Eagle is thread painted using only Fantastico, Lava and Rainbows threads from Superior Threads.  I then outlined the Eagle parts with King Tut, also by Superior.


Here is the background started. I used the paint color to dictate which color thread for the quilting, blending the colors as I quilted.


Binding is such exhausting work!


Finished!  I'm very happy with how it turned out. First quilt I painted fabric for, first thread painted quilt entered in a show! A little photo shop never hurt anyone!


I hope you all enjoyed seeing how I created My Eagle, Bird of Prey. 

Happy Quilting,
Ann


Saturday, May 9, 2015

Radar Update

I have been chastised by my Blogging Friends. I was shocked to see that the last post was in February!  My New Year's resolution to post more often apparently just fell to pieces! I have promised them I would try very hard to keep up with posting.  That being said, what's happening?
A lot!

Radar (pieced by my cohort Kevin, the Quilter and quilted by yours truely) has been a very busy boy. He was featured in On Track magazine. On Track is published by IMQA (International Machine Quilters Association).  We had a four page spread! Because Radar was in the magazine, I was also invited to place an ad!


Next, Radar paid a visit to AQS Paducah! Although we didn't win anything, we had a lot of fun.  This was the first time I was able to go to the awards ceremony. The cheers and squeals of the winning quilters filled the auditorium, especially a Girl Scout troop that won a ribbon.


The next day, Kevin and I found out that not only was Radar picked to be pictured in the Show Book, he also made the cover of the Catalogue of Show Quilts!


Next week is MQS in Cedar Rapids.  I will be there all week as  Dusty Farrell's (Country Stitchin') Teacher Angel.  Drop in and say hello if you're at the show!  I have 3 quilts there this year, another nail biter. It's always a great show with lots of amazing quilts. 

Happy Quilting!
Ann


Tuesday, February 17, 2015

Honor Flight Quilt and Pattern

One of my favorite guys.  I love this picture, I think he's keeping an eye out for me. More likely, he's waiting for a morsal to fall... Now I just need to learn how to remove 'green' eye.


A couple of weeks ago, my friend Kevin (The Quilter) came over to use BeBe to quilt an Honors Quilt for an Honor Flight Veteran. After talking to him and my friend Dar (Dar's Patchwork Garden) I was inspired to also make a quilt for them.  I had a partial panel left from the quilt I made for Quilts of Valor. It was perfect for this project!

First a peek at Kevin quilting....  and the Honors Quilt he made.  Great job Kevin!


The Honors Quilt I made (scroll down for directions) finished at 36"x36". This quilt uses a method I learned from a friend of mine, Cindy, years ago.  And yes, it cuts the points off, BUT because it is consistant thru the entire quilt, THAT'S OK!  Also, you will be working with bias edges. I've been a quilter for over 45 years and I never knew until I joined a quilt guild 9 years ago that I was suppose to be afraid of bias. So I'm not and neither are you!


I used 4 of the leftover squares from the panel used in my Quilts of Valor project.


Since the squares measure 7.5"x7.5", I cut 4 squares (7.5"x7.5") from my white fabric.  Place a white square right side to right side with a panel square.  Stitch 1/4" on EVERY side.  Draw a line on the white fabric on both diagonals.  Grab only the white fabric in the middle, separating it from the panel fabric. Carefully clip open on a drawn line.


 Cut thru the white fabric on each line into the corner, but DO NOT CUT PAST THE STITCHING.


Press the white fabric open, being careful not to stretch the bias edges.  Measure the width of the block.  Cut 4 squares from the red fabric this size.


Place the red fabric right side to right side with the block.  Stitch 1/4" on EVERY side.  Draw a line on the red fabric on both diagonals.  Grab only the red fabric in the middle, separating it from the panel fabric. Carefully clip open on a drawn line. Cut thru the red fabric on each line into the corner, but DO NOT CUT PAST THE STITCHING.


I also like to trim off the extra dog ears.


Open the red fabric and press.  Careful of the bias.


I cut my sashing and border at 4.5" wide, with a center cornerstone at 4.5"x4.5".  Because you are working with bias, I find it helpful to pin before I sew.  It is also easier to stitch with the block on the bottom and the sashing/border on top.  This will help prevent the bias edges from stretching.

I finished my quilt with free flowing water quilting, bound with the white, and it's ready to go.  I hope a Veteran on the Honor Flight will like it.  A small showing of appreciation for all they sacrificed for our freedom.

Thank you Kevin and Dar for inspiring me to make this.


Happy Quilting,
Ann